History Timelines For Kids
Top 10 History TIMELINES For Kids!
Welcome back to the “Top 10 Teaching History Helps” series!
Quick History test!
No Googling! What was the date that the Civil War began? How about World War I ? And can you recall the date that the Wright Brothers took off from Kitty Hawk?
Maybe some of you were able to pop up these dates right off the top of your head… but most of us would have had a harder time remembering the EXACT date. Now go back and look at those 3 events. Can you put them in the correct chronological order? I bet we all can do that!
WHY?
Timelines!
Most of us have a lovely mental timeline of history floating around in our brain. It’s not something we generally think about much, but it’s in there! Timelines (especially ones on paper!) are an amazing teaching tool for history. If you have a visual learner, even better! There are way more than just 10 different types of History Timelines to create, so there are a few things to consider before you jump in and make one.
+What amount of time do you want your timeline to represent?
(This is an important first question! You might need to segment in 100, or even 500 year sections if covering Ancient History, or you might need to order it by 1 year increments if you are covering an event in History such as a World War for example)
+How much space do you have to display your timeline?
+Do your students enjoy getting crafty?
+Do you want an interactive type timeline, or one that is just for display purposes?
**You can read more about how our family made History Timelines in the post “Free World History Curriculum- Teach All Ages At Once“. Scroll down to the section titled “How We Used This History Curriculum”, and you can read more!
When you think of History Timelines, do you think BORRRRIIINNNGGG ?!?!
Need more convincing?
Get ready to be crafty, be creative, and check out these super FUN Top 10 History Timeline Ideas!
Then let me know what ya think about timelines! 😀
Before we start…What are these Top 10 posts about?
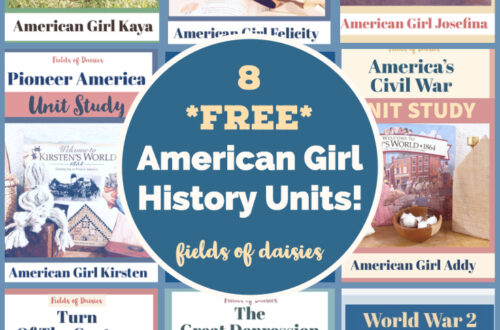
You can read all about the reasons I created the ‘Top 10 History Helps’ series in the first post, Top 10 History Podcasts For Kids. Each part of the Top 10 series will pair perfectly with the FREE Ancient History Curriculum series, the FREE American History Curriculum series, and also the FREE American History (American Girl) Unit Studies series.
And last note!
This post contains just a few affiliate links. There will NOT be any additional charge to you if you click to Amazon through these links, but I will make a small commission if you do! So thanks ahead for supporting my work ! 🙂
SO now… on with the FUN!

#1- Techie History Timeline Templates
As you will find out in this post, there are LOTS of ways to create TIMELINES!!
Explore these “techie” timeline templates! Have fun learning while you are creating these timelines…online!
If you are using the Free Ancient or American History Curriculum , you can find a quick outline of dates and events for each part of the series. This will make it easy to quickly make your timeline of events.
+Creately
This is a timeline creator that is AMAZING ! If you, or your student, loves graphic design and making things “pretty”, this is the online timeline maker you are going to want to try! There are TONS of really nice graphics, and all kinds of options to make your timeline really beautiful. I think these would also work great to create a Power Point at the end of the year, or even to have print and keep in a 3 ring binder for references in future history studies!
**NOTE: You do have to enter your email address, but the program is FREE.
+Adobe Express Timeline
This is a really nice online timeline creator! You can add images, move and change the dates, and even choose from quite a few different design templates! Easy enough for kids to use by themselves, but also great for teacher’s to create a good solid timeline for kids to decorate, add stickers, notes, etc…
**NOTE: You do have to create a free account to print your timelines.
+Read, Write, Think! Timeline Generator
This is a barebones horizontal timeline generator… BUT that’s where the fun comes in!!
Have your student put in their dates and print out the plain version. THEN as you come to each event (or person, or place, etc…), get creative!!
+TeachNology Timeline Maker
Place up to 6 events/dates on this horizontal timeline maker. This timeline is also very basic. You could print out the timeline with just the dates and have your student(s) hunt down what event took place on those dates !

#2- Clothesline History Timelines
This is a great choice if you’re looking for an interactive, hands-on kind of Timeline that your kids can arrange and rearrange! What exactly is a Clothesline History Timeline?
It’s really just a piece of colored ribbon, yarn, fabric, or other sturdy material that can be cut to the desired length and hung either on a wall, or across a room like a… clothesline!! Timeline events/people can be added by affixing index cards (or whatever medium you choose to use) to the line. SUPER easy!
+Where To Find Images For Your History Timelines
-DIY Drawings
Your children may enjoy drawing the timeline images (even stick figures are great!) to go along with each date.
You can find some pretty fun drawing tutorials on YouTube by searching “How to draw…” , like How To Draw Famous People. Or you might enjoy this History handwriting and drawing program, Draw And Write Through History!
-Clip Art
You could do a quick search and easily find specific clipart images online to print, color, and glue onto index cards.
Pixabay is a good (and free) site to find both vector image clip art and also photos !
-Old Books and Magazines
Old magazines or books make a creative way to cut and paste ideas on index cards. If you don’t have any old school materials sitting around collecting dust, shop your local Goodwill for old history books, textbooks, encyclopedias, etc, and you will almost always be able to find LOTS of images to clip and paste!
-Paper Punches
Use poster board or heavy construction paper to punch out as many “tags” as you need. Even if you do not use these for your “event” cards on the clothesline, they would be great to note intervals of time! You could use any shape punch really!
Here is the one I used- XL Tag Paper Punch
-History Flash Cards
These are a little hard to find by a specific era, but these Montessori History Learning Cards, and these American Presidents flash cards are a good example!
-History Stickers!
These are so much fun!! Who doesn’t LOVE stickers?!?
Dover really has super inexpensive history products, including stickers. You might have to think outside the box just a little bit to get the exact types of stickers you’re looking for.
Dover Ancient Egyptian Art Stickers and Egyptian Life Stickers, Art Masters , or the WW2 Poster Stickers
OR Try these assortments of history stickers:
Famous People of History Stickers , Famous Historical Landmark Stickers
-Printable History Cards
If you are using any of the Free Ancient or American History Curriculum from Fields of Daisies, you can use the companion Printable History Cards for each section in the series! Just print them out, laminate them if you want to, and you’re all set. I do LOVE my laminator (if you’ve followed me awhile you know this lol)!! Laminating whatever cards you use on your timeline will help to keep the edges from curling up, and make them extra durable!
There are 2 complete sets of cards in each pack- one fully colored already, and one that is in black and white for your creative kiddos who like to color.
The Ancient Civilizations/Old Testament History Cards are FREE!

#3- History Timeline Binders
Out of all the different types of History Timelines, these are without a doubt my FAVORITE type!
Binder Timelines are particularly easy to add things in whenever you want to. If we studied an artist, a scientist, or even heard an interesting story from history on tv, we would frequently either make a page, or add it to one that was already in there! AND as an added bonus, flipping through the binders to find the right place to add your page in makes a SUPER good review! Our family used sturdy 3-ring binders to make the timelines, and after more than 26 years and 16 moves (2 internationally!), I STILL have our History Timeline Binders!! Why? Because they are such a sweet collection of my children’s growth, and the time we spent learning together. We used ours for YEARS and just kept adding to them as we studied! You can read more on how we used them -Free Ancient World History: Teaching All Ages At Once!
Just scroll on down to the section titled “How We Used This History Curriculum”.
These History Notebooks also make great coffee table books to spark conversations and show off the kids’ work to grandparents and friends 🙂
*NEW!
I recently made this short YouTube video [ How To Make A History Timeline Binder] to show you one of our History Timeline Binders, and some of the ways to use it!
You can also check out this post- Creating A History Timeline Binder
+Where to start:
-Decide what kind of format you’d like to use for your pages.
*Basic Binder Timeline– You might like to just fill your binders with blank pages and a solid black line running across the bottom. Add colored dividers with whatever time segments you’d like (100 year increments work well). With this method, you just pop open the binder, find a blank page, add the date on the solid black line, and the event above it.
*Creative Pages Binder Timeline– This is also simple, but is best for kids who love to color, draw, or cut and paste. First, determine how much time will be represented on each page. You could do one page for 10 year increments for example, or you could do a separate page for every event, person, or place you want to add in (this is what worked best for us). We also added colored pages in to denote 500 year time divisions for BC dates, and 100 year time divisions for AD dates. You could do this with colored tabs too. If you are using the Free Ancient or American History Units, I have lists of People, Places, and Events by date to use as a good foundation to build on.
*Template Binder Timeline– Another option is to print out a bunch of duplicate pages with a timeline template, and fill them in as you study! Here are a few free examples I found.
Notebooking Fairy Timeline Templates
Sample Timelines For Kids
Color Timeline Templates
***You may also like the Binder Timeline combo idea in #6 below!***
-Gather Your Graphics!
*You can definitely use all of the ideas found under the #2 Clothesline History Timeline section. The main difference is that the History Binder Timelines can also have an entire page for each entry if you so choose.
Here are a few extra ideas if you are going to go that route.
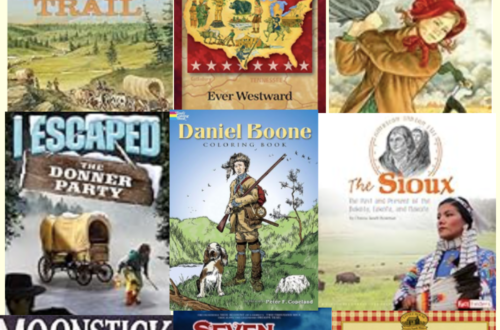
*History coloring books or coloring pages
There are TONS of free coloring pages online to print and use! If you are using Fields of Daisies’ Free History Curriculum, I have a list of coloring pages that compliment EACH day’s lessons, so that you can simply print out whichever ones you like, add a date at the bottom, and stick them right into your binders!
Calvary Curriculum has a huge selection of coloring pages for pretty much the entire Bible. These are great to add into your binders and be able to visualize when people like Abraham or Elijah lived, and how that overlaps with the text book history most of us have learned as children. SERIOUSLY amazing!! I recently went and added in a Bible section to most all of the Free Ancient History Curriculum posts so you can easily do this!
USA-Printables (SO good! This site loads reallllllly slowly though!)
Decades Coloring Pages
Also, History museum Websites, like this NC History Museum usually have great printables!
My favorite history coloring books are made by Dover-
Life In Ancient Rome Coloring Book
The Lewis and Clark Expedition Coloring Book
The American Presidents Coloring Book
Life In Colonial America Coloring Book
*History Maps of Important Places
Don’t forget to add some maps to your binder! You could simply add them all in the beginning or end of the binder, or you could add them throughout the timeline as you talk about each location. You can use blank outline maps and have your student fill them in as part of their work, or you could just print them out and use them as a reference when needed!
Outline Maps
Blank Outline World Maps
Labeled Country Maps
*Create!
The sky is the limit on creativity. Think bullet journaling, acrostic history poem pages, collages, mixed media, sketches, word art, etc! You have an entire page!

#4- History Tree Timelines
History Tree Timelines are another super fun method of creating timelines!
These are a good option if you have limited space. You can hang them vertically and continue to “grow” your tree upward through history, or you can create a history forest of trees by era on the wall!
+HOW do you create a History Tree Timeline?
-First, as with all timelines, you will need to decide on the segment of time you want to study/display, and then how you want to organize it. You could do one giant tree, or lots of smaller trees.
You can see 3 different examples of ways to organize your timeline tree in the image below.

Sample #1:
This giant timeline tree “grows” vertically as you add whatever you are studying. For example, you could make this tree just for American History, and add the events from the earliest to the latest in date on the leaves as you go along. OR you could make that same vertical tree for an all encompassing World History study! For that, you would start with creation on the bottom and work your way upward, adding branches and leaves as needed. Each segment of the tree trunk could be labeled to denote a different time period, or you could simply just keep adding events, people, etc…with dates chronologically going toward the top.
Sample #2:
This timeline tree would be part of a forest. Take each section of history that you are studying and create it’s own tree. A tree for Ancient Egypt, another for Ancient Greece, and another for Early American History for example. Just as in sample #1, you could either simply add leaves from the earliest date (lowest part of the tree), to the most recent dates (top of the tree), OR you could label each of the branches in 100 year increments like the image above, and organize your leaves that way.
Sample #3:
This timeline is sort of a combination of sample #1 and sample #2.

#5- ‘Round the Room History Timelines
If you have a dedicated space for homeschooling (even the kitchen table!), this type of timeline is super, especially if you have very visual learners. Think the history version of the ABC’s we all probably saw around the perimeter of our kindergarten classrooms.
Pros: Constant visual reminders of the chronology of the time you’re studying
Easy to point out on a timeline where a person or historical event falls
Cons: Requires quite a bit of space
More difficult to make interactive/add extra cards to
The first step for the ‘Round the Room Timelines is pretty much the same as all the others. Decide the span of time you want to cover. Next, you’ll have to choose how you want to organize that time. Below are a few ideas to get you started!
+By Date
This type of order would probably be the best choice if you think you’d like to possibly add cards as you go. Start with your beginning date on a larger piece of paper or card. You can then add dates by 10 year increments (or more- 100+ if you are doing a World History or Ancient History unit), leaving space between to add smaller cards for your people/events that you are studying. You can go ahead and put the entire timeline together at once, or add in the people/event cards as you go along.
+By Image
Another way to create this type of timeline is with your history images. If your goal isn’t necessarily to memorize exact dates, but give your students a visual picture of the flow of events over a specific timeframe, making a ‘Round the Room timeline with images may be better than a “by date” one. Studying Early American History? You could begin your timeline with an image of the Vikings (for example) and end with an image representing the Civil War. Each image would be the “date marker”.
If you are using the Ancient History Printable Cards or the American History Printable Cards, they would make a quick and easy way to create a ‘Round the Room timeline! You could use the Event cards as the “date” markers, and add the People and Places cards in between as you study (or all at once if you prefer). If you scroll to #6 in this post you can see a Printable History Card Timeline in full.
+Mini Round the Room Timelines
If you have a smaller space, or have a special place in your heart for sticky notes, then THIS is the ‘Round the Room timeline you’re going to want to try!! You could choose to arrange this timeline by either date or image, whatever works best for you! This is especially a good fit if you are doing a short unit and don’t want to spend a ton of energy on making a huge timeline, or if you will want to be able to move your timeline around. I have to admit, it isn’t as “pretty” as some of the other options, but it can be lots of FUN!!
You can use index cards, but the sticky notes are my favorites. 😀 You can make this even more fun by letting your kids draw the event or even use history themed stickers on each card to represent the event/date.
Here’s an example of some history stickers you could use –
*Some (not all) of these are found on Amazon. I am an Amazon affiliate and will make a small commission if you purchase through the links. This disclosure is required 😀
1500 Sticker Fun History
Ancient Rome Ultimate Sticker Book (for example)
World Landmark Stickers
History Odyssey Stickers

#6- History Cards Timelines
This type of timeline is BY FAR the easiest on the list. It’s pretty much purchase, and hang wherever and however you’d like! Of course I am partial to my own Printable History Cards, but there are lots of other history cards out there to purchase! You could also make your own. I highly recommend laminating the cards, especially if you add the “danglers” that I suggest below!
If you’re feeling a little creative (since this option is so EASY!!), here are a few ideas to spice up your History Cards Timeline-
-Timeline Danglers (Good space saver!)
Ok. So maybe this sounds pretty gross, but I couldn’t come up with a better name lol. Just punch a single hole in the bottom of your Event Cards and you can easily add the People and Places cards under the appropriate Event. Just punch a hole in the bottom of any of the cards, thread a piece of yarn or ribbon through the hole and attach the next card (hole in top of that card) . This is a great choice if you have limited space as well!
-History Cards + Mini Cards (Best of both worlds!)
If you loved the idea of the mini cards in #5, but love the ease of the History Card Timeline, you can incorporate the two ideas in a minute! This method is extremely flexible and is perfect for those of you who are especially excited to add lots of people, places, and events in as you read them in books, see them in a movie, or find them in some other subject area you are studying! Just hang your History Cards where you’d like them, being certain to leave plenty of space BELOW each History Card. As you find something you and your children want to add, follow the ideas in #5 for the minis, and stick them right under your larger sized history card!
-History Cards + Binder Timelines
This is another one of those great combo timeline approaches. If you loved the IDEA of a binder timeline (#3), but the whole thought of creating a giant binder full of pages stresses you out, then give this idea a try! You can just print out/purchase your history cards, date them, and stick them in your binder. VOILÁ! If you want to add more, just have your children create, color, or print out a page and add it in wherever it goes on your timeline! SO EASY!

#7- Big Box History Timelines
Ok. So I may have made this type of timeline up. 😀 But it’s super cool! I love it!
This is a great option if you have limited space, and also if you like an interactive timeline.
Be as creative with the interpretation of this title as you’d like lol. Basically, it’s grouping the people, events, and places in history by sorting them into visual “boxes”. I’ve listed some ideas for the types of boxes you could use below, but I know there are tons of other ways to create this type of timeline.
-Poster Board “Box Timelines”
Once again (sorry for the repetition), choose the segments of time you want to study, and write them in a large print on the top of your poster board. You could use ONE piece and divide it into 4 “boxes”, or you could use as many pieces of poster board as you need. Write either your dates (Poster #1: 1800-1900, Poster #2: 1901-2000 for instance), or your topics of study (Poster #1: Early American History, Poster #2: Modern American History).
Next, decide how you want to add the events/people/places in your timeline boxes.
-You could print out one of the templates in #3 and paste it into your box. Then simply write in the information you want to add.
-You could use the stickers or sticky notes as discussed in #5! Or you could write on these sticker labels (amazon aff. link) and stick them to the poster board where they belong.
-You could use bullet points
-You could use printable history flipbooks or notebooking pages and glue the backs onto your board
-You could draw shapes and add them anywhere you’d like into the box.
The point is the visual image of what events/people/places fit into a certain time in history!
-BOX “Box Timelines”
Surprise! Did you know you can create a timeline with real BOXES?!
This is without a doubt THE most fun and interactive timeline idea yet! The Littles in your crew would LOVE this, and I think the bigs would too. If your family loves HANDS-ON learning, this is the history timeline you just have to try!
Simply grab a collection of empty boxes or plastic tubs and label each one with your desired time or history topic. Next, as you create your hands-on history projects add them right into the box. This is a History Museum in box!
If your family really isn’t all that crafty, don’t worry about it, this is still a GREAT timeline for you! Think of this option as a Montessori type activity for history!
You could-
-Have your kids go on a scavenger hunt in their toy boxes for an item that would represent what you are studying.
For example, a toy soldier (WW1), an airplane (Wright Brothers), a tea bag (Boston Tea Party). Have them each add in their object, and then from time to time review what they’re learning by pulling out an object and telling what history event it represents!
-Purchase small trinkets (like the ones above) specifically for each topic you are studying. Each object will become a launching point for the day’s history lesson, and later for review. They could even put the boxes in chronological order and then the objects in them! I LOVE LOVE LOVE the Toobs toys for this idea. I’ve used them in the past to make matching history cards for my Littles, but these would work perfectly with the box timelines!
Here are a few to give you an idea (amazon aff. links)-
–Ancient Rome Toob
–Ancient Egypt Toob
–Space Toob
–Knights and Dragons Toob
-Pizza Box “Box Timelines”
Another fun way to create interactive history timelines is to use pizza boxes. Most pizza places will sell them to you for super cheap (some will just gladly give you a few). And of course you can also buy plain white pizza boxes online (aff link).
This is a perfect option for your timeline if you have even just an empty corner in a room- you can easily stack them up, write the date/topic on the front, and then put whatever you’d like inside (as per the directions above)!

#8- Tape Timelines
Yep! TAPE! Kids LOVE LOVE LOVE tape.
Are you seeing all the paint peeling off your walls? Don’t worry. No duck tape will be used in the making of these timelines! Do be sure to use Washi Tape (aff. link) or the blue painter’s tape (aff. link) that will not stick to your walls and damage your paint. I recommend testing a small area first to be sure it doesn’t cause any problems though.
Here’s to another super simple and quick timeline that you can literally put together in minutes!
Grab your tape. Pick your wall (or in my case lip of a bookshelf). Slap the tape on up there. Label your time/topic of history and get moving!
If you’re wondering how to add your events/people/places on a tape timeline, here’s a few ideas I had:
-Make an all tape timeline.
Create your horizontal line (the solid blue painter’s tape would be good for this). Separate your solid timeline into sections of time (the Washi Tape would be a colorful way to do this, and would make it visually easier to see the dates/topics). Then add in diagonals or vertical pieces of tape with events, etc. written on each one (again with the solid blue tape).
-Tape and Sticky Notes
I know. I know. I do loveeeeee a sticky note. They even make mini sticky notes (aff link) that would be SO GOOD for this timeline! Just create your horizontal timeline with the tape. Mark off your time/topic of history with a colorful piece of tape. Next, add small pieces of tape vertically and write the date you want. Below each vertical line, you can add in your mini sticky note with the event, person, etc. under the correct dates. Easy peasy!
#9-Science Fair History Timelines
Ok. Confused?
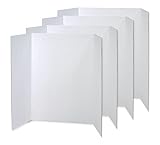
Are we talking about history here or science ? I mean technically it’s all history. Anyway, a Science Fair History Timeline is simply a timeline displayed on one of those old school tri-fold cardboard displays (aff link) that we used to make our science fair projects on. Anyone remember those?
This is a great option for those of you who have very limited space for a timeline. You can easily fold these up and slide them under the couch, behind a bookshelf, or under a bed if you don’t have a place to keep them on display.
-Pick your date/topic.
-Choose one of the ways to create your horizontal timeline (tape, yarn, “boxes” of poster board or other paper, or even printable timeline templates.
-Get creative!
These 3″ Circle Stickers (aff link) would also be a super cute way to make these boards extra fun!! You could use them for date divisions, or write your events on them and make the circles your actual timeline! I love these!


#10- History Scroll Timeline
And last but not least, perhaps the most antiquated type of history timeline of all. A scroll!
People have been using scrolls to record history for millennia. Wouldn’t it be fun and a double lesson to try making your own history scroll timeline? This is another SUPER simple timeline option.
What you’ll need:
-A roll of craft paper (aff link)
(You can use butcher paper too, but be sure it doesn’t have a wax coating)
-Either 2 large cardboard tubes from something like a roll of wrapping paper, or you could use thick dowels, or even a pool noodle cut in half!
-Any crafty stuff you’d like to create and decorate the actual timeline
First, you’ll need to affix the end of the “scroll” paper to the cardboard tube, dowel, or pool noodle. be sure this is done well so that it won’t pull off with the first use.
Next, start rolling the paper onto that end of the tube until you get the desired length onto that side of the “scroll”. The goal is that when you are done the timeline will unfurl in the traditional left to right way.
OR if you want to really get another lesson in, just start the scroll and read it right to left like the ancients did! Your kids will easily see why this was the case!
Finally, start at whichever end you chose to make your beginning. Unroll just enough of the timeline to add to it each day.
Be as creative as you want in how you decide to mark out the time (I still love those 3″ circle stickers for this)!! Use the ideas in #1-9 above! Washi Tape, history stickers, coloring sheets, printable history cards, etc. ALL of those would be great methods for this particular type of timeline!
And lastly, HAVE FUN!
I’m imaging a beautiful fall day in the backyard with our scroll taped to the fence. Reading some adventure in history, and adding our notes on the timeline scroll. THAT my friends is a Fields of Daisies kind of day!
Happy Living, Loving, Learning… and (Time)LINES friends!
**TOP 10 Teaching History Helps Series**
+Top 10 History PODCASTS
+Top 10 History SONGS
+Top 10 History TIMELINES
+Top 10 History AUDIOBOOKS
+Top 10 History MOVIES
+Top 10 History BOOKS (This is the ULTIMATE history book list!)
+Top 10 History GAMES
+Top 10 History HANDS-ON
+Top 10 History PRINTABLES
+Top 10 History FIELD TRIPS
And a bonus…
+Top 10 History for the HOLIDAYS
+Top 10 AMAZING Homeschooling Resources At The Library


You May Also Like

Civil War Books, Movies, and Resources List For Kids!
American Girl Unit Studies Overview